Is your lens back- or front-focusing? Don’t despair, you can calibrate the lens without expensive and complicated tools. Here is how to calibrate lens autofocus.
Karl Taylor posted a short video where he explains well how to proceed to calibrate your lens. He says:
Have you ever noticed your lens isn’t always pin-sharp when using autofocus? This lens autofocus problem can happen because lenses can drift over time. You want your autofocus to be pin-sharp – I demonstrate how to simply calibrate your lens autofocus without needing to buy a lens calibration tool or calibration chart.
All you need to accomplish it is:
A piece of whiteboard
A standard ruler
A pen or pencil
The lens for calibrating
Your camera with tripod
And here is the 5 minutes video explaining how to calibrate your lens:
Going out to take pictures in cold weather? You better protect your gear. The infographic below tells you how to protect your camera
Before You Head Out
1. Never leave the house without wearing a pair of waterproof and insulated boots to keep your feet warm and dry, even after standing for long hours.
2. Go out with fresh batteries and carry spare ones in your pockets. This ensures you’ll be able to quickly switch to fresh, warm batteries and continue shooting. Also consider using an additional battery grip for longer lasting power.
3. Bring along a carbon fibre tripod as it handles the cold better and helps to lighten your equipment load. If you’re using an aluminum tripod, wear your gloves when touching it. Find out the basic equipment you’ll need to bring with 10 Things to Pack for a Photoshoot.
Here is the infographic about how to protect your camera:
Cold Weather Shooting Tips
1. Clean and crisp winter air means sharper photos. With the sun lower in the sky, quality of light is better for more hours of the day. The shadows formed are also longer, which adds more interest to landscape shots.
2. Snow can be tricky to shoot. Tip: Expose for the brightest portions of the scene and ensure your highlights don’t get blown to all white. Using a lens hood also keeps light from bouncing around.
3. Use a circular polarising filter (CPL) to clear up any haze in your photos, and reduce glare on snow and ice.
4. Limit your usage of the LCD screen to cut down on chimping, or checking every photo immediately after clicking the shutter button. Instead, use your camera’s viewfinder to help conserve battery life.
5. Achieve a minimalist look in your images by keeping an eye out for details, such as a ski cabin that stands out on the mountainside, as the landscape becomes a blank canvas for you to get creative with.
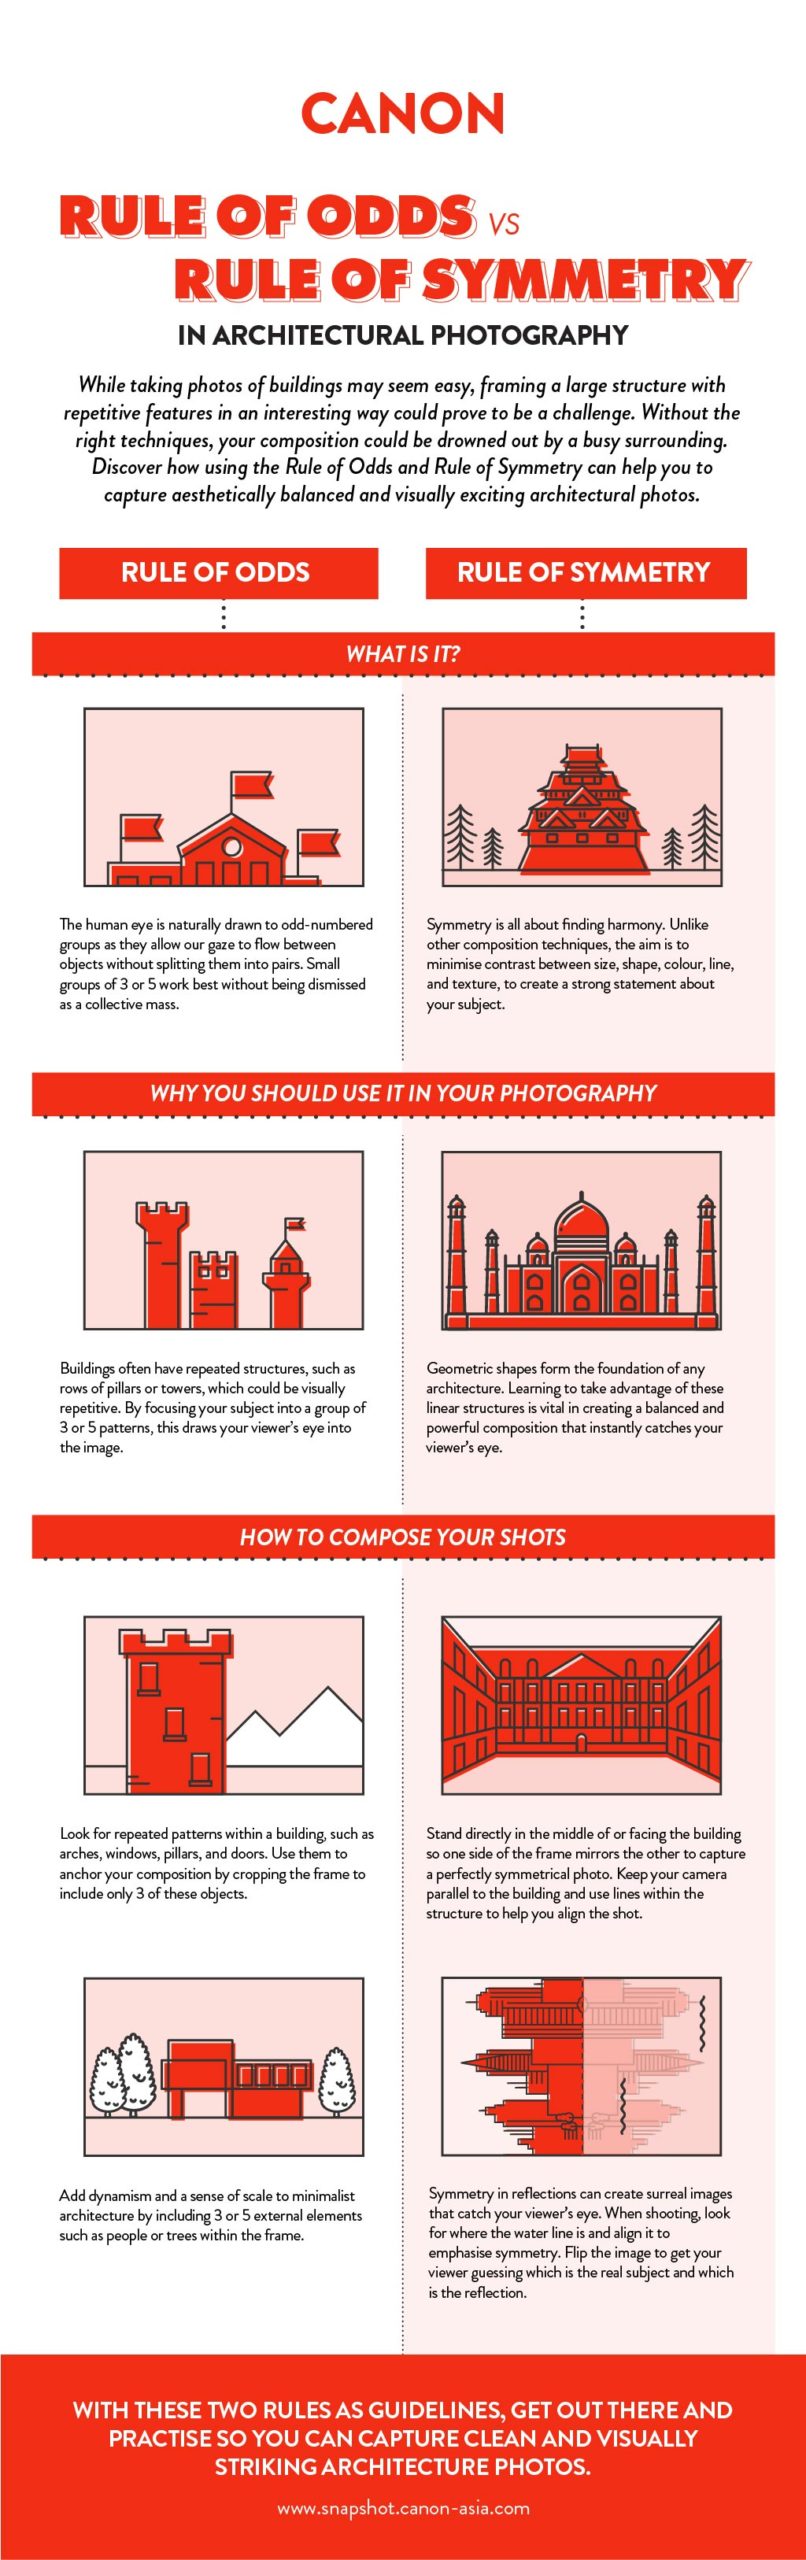
This infographic is about the rule of odds and the rule of symmetry. From Wikipedia:
There are numerous approaches or “compositional techniques” to achieve a sense of unity within an artwork, depending on the goals of the artist. For example, a work of art is said to be aesthetically pleasing to the eye if the elements within the work are arranged in a balanced compositional way. However, there are artists […] who aim to disrupt traditional composition and challenge the viewer to rethink balance and design elements within art works.
[…] The “rule of odds” suggests that an odd number of subjects in an image is more interesting than an even number. Thus if you have more than one subject in your picture, the suggestion is to choose an arrangement with at least three subjects. An even number of subjects produces symmetries in the image, which can appear less natural for a naturalistic, informal composition.
An image of a person surrounded/framed by two other persons, for instance, where the person in the center is the object of interest in that image/artwork, is more likely to be perceived as friendly and comforting by the viewer, than an image of a single person with no significant surroundings.
And without further ado, here is the infographic about the rule of odds and the rule of symmetry:
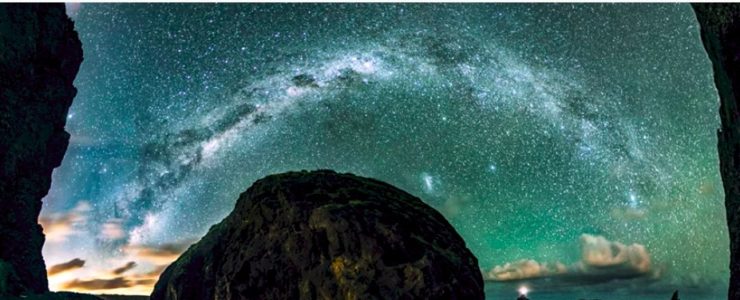
Are you into astrophotography? Or did you just get the Canon EOS Ra and want to start with the craft? Here is a short how to shoot astrophotography tutorial.
The rather in-depth how to shoot astrophotography panoramas video was made by motion control gear company Syrp together with astrophotographer Charles Brooks:
Charles Brooks is a true expert at astro panoramas. He runs Opus Expeditions in New Zealand, taking adventurous photographers to the most breathtaking locations around the country. He has mastered the art of Astro and in this filmmaking guide, he shares all of his best-kept secrets about how to shoot a multi-row panoramic Astro image.
Anyone can take a good photo of the stars, but not everyone can get that mind-blowing effect that you’re about to learn.
In this video, Charles walks you through the process of taking amazing Astro panoramas. This is a very in-depth tutorial that goes from the gear he uses and location-scouting right through to post-production.
The 30 minutes video (below) covers various techniques and general tips about astrophotography. it discusses gear, location, setup, and post production.
About location:
As 83% of the world population lives under light-polluted skies, it can be really hard to escape these bright areas, as traces of light can persist for miles.
[…] Charles uses a website called Dark Site Finder to find the perfect spot for this shoot and Photopills to find exactly where the Milky Way is going to be at during this time of the year, thanks to their Planner and 2D Milky Way modes. The best season is different for the Southern and Northern Hemisphere.
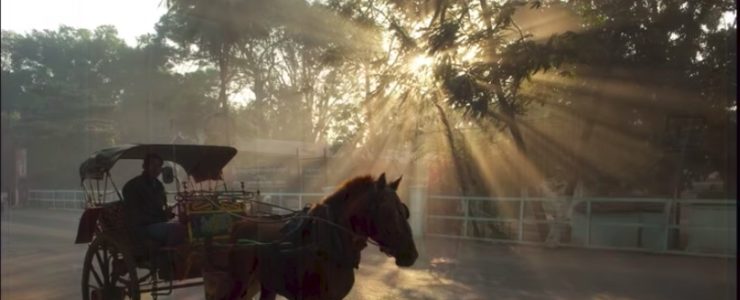
Taking pictures and maxing out the creative possibilities of natural light is not as easy as you might think. A short video shows how to use it for your photography.
In the video below by Advancing Your Photography, National Geographic Photographer Bob Holmes shows how to get the most out of available, natural light.
Bob Holmes shares his years of experience as a National Geographic and travel photographer, with tips to help you make the most of natural lighting. These are tips that can be used for any genre of photography to help you advance your photography!
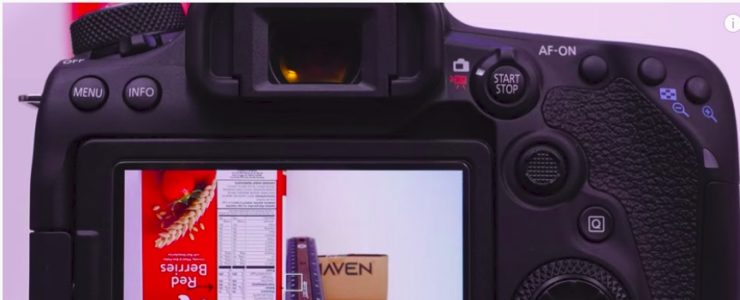
Here is something useful. A video about hot to do autofocus microadjustment.
The 14 minutes video below by Michael The Maven shows how to microadjust autofocus on your lens using a cereal box and a ruler. He uses a Canon EOS 90D to show it.
The cereal box and ruler method allows photographers to quickly visualize where their lenses are focusing and to verify if they are out of alignment. This video demonstrates the philosophies of MFA (micro focus adjustment) and some of the principles to become familiar with if you decide to try this on your own.
If you prefer there is a neat written tutorial about how to do autofocus microadjustment by Canon itself and you can download it here.
This website or its third-party tools use cookies, which are necessary to its functioning and required to achieve the purposes illustrated in the cookie policy. If you want to know more or withdraw your consent to all or some of the cookies, please refer to the cookie policy. By closing this banner you agree to the use of cookies.