How To Shot A Unique Wedding Film With Canon Gear

The Canon Digital Learning Center published a video with wedding cinematographer Joe Simon about how to shot an unique wedding film with Canon EOS equipment.

Join wedding cinematographer, Joe Simon, as he shares his views and techniques for shooting a stylistic wedding video using Canon’s Cinema EOS and HDSLR cameras. Joe also discusses his experiences using the new Dual Pixel AF feature upgrade available for the EOS C100, and how it has improved his shots by opening up the potential for more dynamic camera movement and focus effects.

In this video you will also learn:
  • One-shot AF improvements with the Dual Pixel AF feature upgrade
  • Continuous AF improvements with the Dual Pixel AF feature upgrade
  • AF Lock and unlock functionalities, and how to take advantage of them
  • Joe’s approach to camera setup for filming the ceremony and first dance
  • Which camera support systems Joe uses for weddings, and why
[via CDLC]

How To Take Care Of Your Photo Equipment In The Cold

Photo Equipment In The Cold
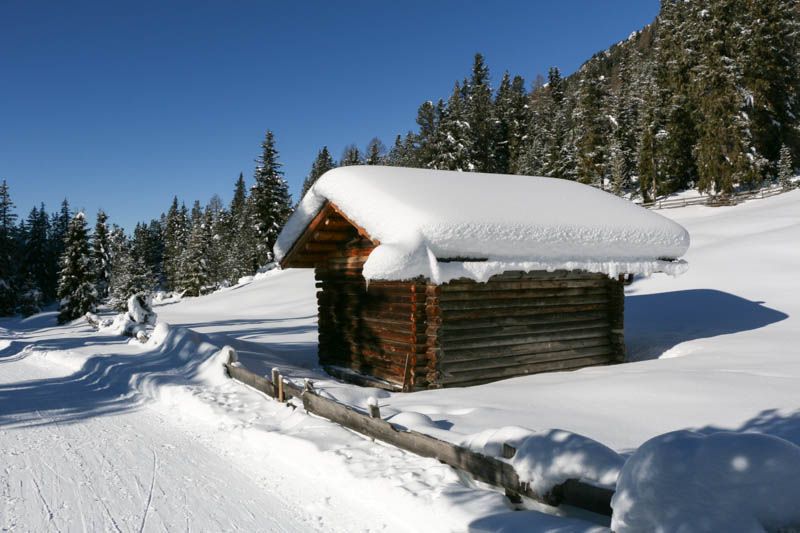
[shoplink 14246]Canon EOS 70D[/shoplink] & EF-S 18-135mm IS STM – Shot at 18mm (ISO 200, 1/1000, f/11) during a hiking trip in the Alps (out of the camera, no post-processing)
The Canon Digital Learning Center published an article about how to take care of your photo gear when it is cold.

If you take a camera into a cold environment, the first thing you might notice is that battery life begins to drop. By 32 ˚F (0 ˚C), you might only lose 10% of the battery’s potential, but if it grows colder then it starts to become more noticeable. The first step to combat this is to keep your spare batteries inside your clothing, as close to your body as possible. In moderately cold conditions, this will be more than enough to keep the batteries within a normal operating range. It might be tempting to keep smaller point-and-shoot cameras inside your layers as well, but even in cold temperatures, we sweat when exerting energy like when you’re walking through deep snow or skiing. This sweating will cause condensation on your lens and potentially inside your camera, so it’s best to keep smaller cameras in a backpack or outer pocket.

You may also be interested in this CDLC article about how to set white balance to photograph snow.

[via CDLC]

How To Set White Balance To Photograph Snow (Canon DLC)

How To Set White Balance
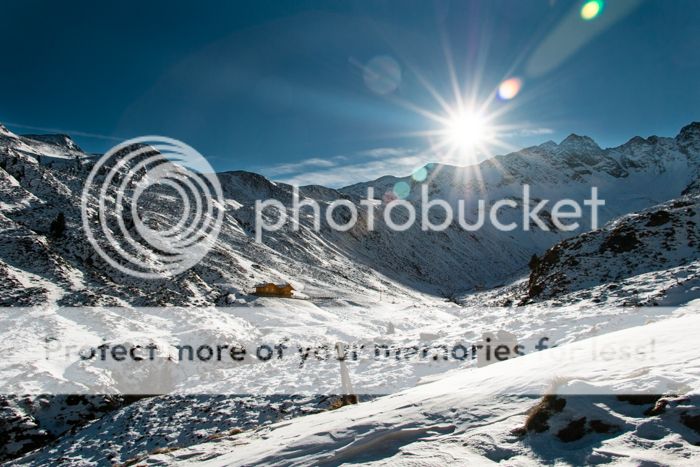
[shoplink 14246]Canon EOS 70D[/shoplink] & EF-S 18-135mm IS STM – (ISO 200, 1/1000, f/8, shot at 18mm at a hiking trip in the Alps)
The Canon Digital Learning Center posted an article with useful tips on how to set white balance to photograph snow.

An excerpt:

If you’ve ever looked at one of your winter images and thought that things look a little blue, then you’ve discovered one of the challenges of photographing snow: getting the right white balance or color temperature. White balance is a fundamental camera setting that adjusts color rendition to give a neutral appearance, without any obvious overall color tints or shifts. Cameras come with several White Balance presets (Daylight, Tungsten, Flash, etc.), but difficulties can arise when there are mixed light sources all adding their own color cast. In fact, it doesn’t even need to be a direct source either because all reflected light will have a color cast that’s dependent on the color of the object the light just bounced off of. If there are objects in your image (quite likely!) then you’ve got multiple color casts, in some way.

[via CDLC]

Inside Look at Canon’s EF Extenders (Canon DLC)

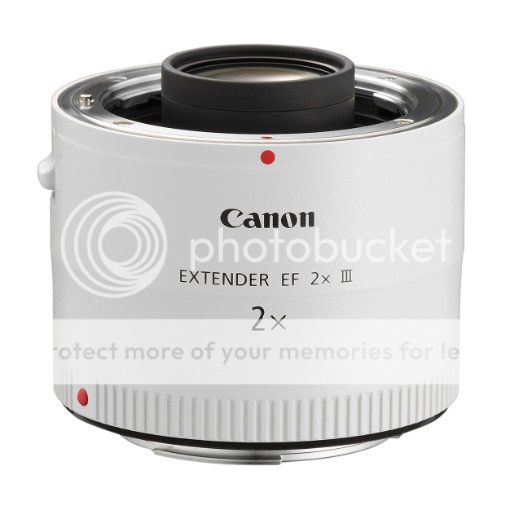
The Canon Digital Learning Center published part 2 of their article series about Canon EF and tele extenders (part 1 is here). Some extender basics from part 1:

  • Tele extenders cause an unavoidable loss in light transmission to the imaging sensor or film. There’s a constant, steady 1-stop light loss with 1.4x Extenders and a 2-stop loss with a 2x. This is consistent, regardless of camera or lens brand.
  • A 1.4x Extender multiplies the effective lens focal length by 1.4x. Thus, a 300mm lens would have the power and field of view of a 420mm lens. And a 2x Extender doubles the effective lens focal length.
  • When using a digital SLR with an image sensor smaller than a full-frame, it’s “crop factor” is added to whatever an extender is to calculate effective lens coverage relative to a full-frame camera. In other words: an EOS Rebel has a 1.6x crop factor. If using a 200mm lens with a 2x Extender (400mm equivalent), putting it on an EOS Rebel would result in a lens that effectively “acts” like a 640mm lens (400mm x 1.6 = 640mm) would on a full-frame or 35mm film camera.
  • Tele extenders do not impact or change a lens’ minimum focus distance. Because extenders do impact effective focal length, at minimum focus distance, a lens with extender provides a noticeably tighter composition of small objects than the lens alone would.
  • Canon EF 1.4x and 2x Extenders are exclusively designed to work with specific, compatible Canon EF lenses. Part of the reason for this is the front element design of Canon extenders, which literally projects forward and into the rear of any lens they’re attached to. This enhances optical performance with those lenses, but prevents their attachment to many lenses that have a rear element flush with the rear lens mount.
  • Canon EF lenses that are extender-compatible:
    • All fixed focal length EF L-series telephoto lenses, 135mm and above (thru 800mm)
    • All white-colored EF 70-200mm f/2.8 and f/4 L-series zoom lenses (all versions)
    • EF 100–400mm f/4.5–5.6L IS USM zoom
    • EF 200–400mm f/4L IS USM Extender 1.4x zoom (can be used in addition to lens’ built-in 1.4x)

A Detailed Look On AF Microadjustement (Canon DLC Article)

af

Canon’s Digital Learning Center published a long article about auto-focus microadjustement, a useful feature you find on Canon’s higher level DSLRs, and a feature that was thankfully re-introduced to the xxD line-up with the Canon EOS 70D.

From the introduction:

What does AF Microadjustment do?
It allows the user to command the camera to intentionally shift the sharpest focus either in front of or behind where it’s factory-set. The extremely precise AF system in a digital SLR is designed to read contrast at the subject, calculate how to drive the lens to focus sharply on the subject, and confirm sharp focus once the lens has stopped. With AF Microadjustment, the user is changing the data coming from the AF system, and asking it to move the lens farther in one direction or the other whenever it has to read and calculate sharp focus.

The adjustments applied using this control are based on the depth-of-field you’d have at a lens’s maximum aperture. They are not based on the lens’s focal length! When setting the Microadjustment, you’ll see a scale on the camera’s LCD monitor with up to + or – twenty steps. Each step is a very fine increment, equal to 1/8th of the depth-of-field you’d have with the current lens wide-open. And that 1/8th of the depth of field is only moving forward (toward the camera) or back (toward the background) from the sharpest plane of focus. The main thing to remember here is that these are very fine increments. Don’t expect radical shifts in focus with adjustments like plus 3 or minus 5.

How To Fix An Annoying Design Flaw (Canon Powershot S120)

This happens to all of us, sooner or later: we bought new gear and there is something that’s totally wrong placed, or doesn’t really make sense, or can’t be used as supposed.

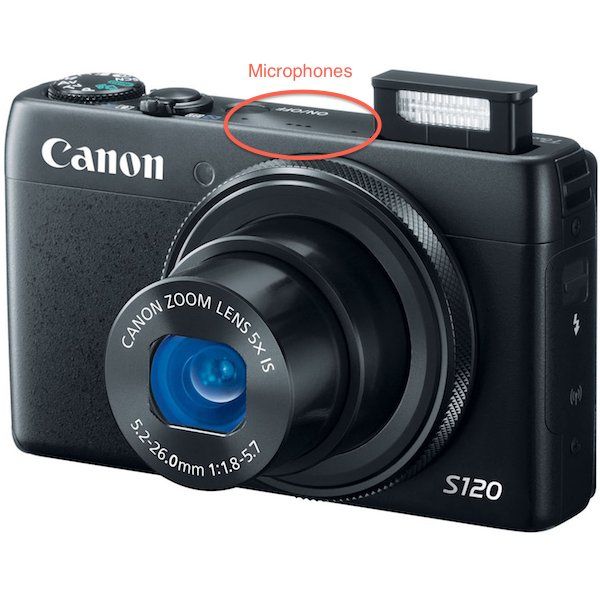
In this case the camera is the Canon Powershot S120, a well-performing, WiFi-enabled compact camera with good video capabilities. But there is a problem Casey Neistat couldn’t live with, and for a good reason: the microphones of the S120 are placed on top of the camera, where you spontaneously and normally place your fingers when holding the camera (see pic below). Result: bad sound quality since the mics are covered.

Watch Casey Neistat‘s ingenious solution to tackle the issue in the video above.

[via gizmodo]